
Ingredients for White Sandwich Bread
 Active Dry Yeast – Always proof your yeast to ensure it’s alive and kicking (unless you have recently used it with success. If you prefer, you can use instant yeast instead.
Water (lukewarm) – Make sure your water is lukewarm, ideally between 100-110F. If you don’t have a thermometer, use the finger test – the water should be similar to your body temperature.
Sugar – Granulated sugar or honey both work well in this recipe.
Bread flour – For the best results, use bread flour. If you only have all-purpose flour, it will do, but note that the texture won’t be as soft and chewy.
Salt – Fine sea salt is preferred, but feel free to use other types of salt, adjusting the amount according to their saltiness.
Oil – To keep the flavor neutral, I suggest using canola oil instead of a strongly flavored one.
Equipment and Oven Prep
Standard mixer – You can create this recipe by hand, but I prefer to use my standard mixer. I start my dough slowly with my Kitchenaid stand mixer on a level 2 setting and gradually move it to a level 4 setting.
Loaf pan – I recommend a smaller pan for the best bread rise. My go-to is the USA 1lb loaf pan, but you can also use a standard 9×5 loaf pan.
Bench scraper – A bench scraper is a handy tool for dividing and shaping bread. It also assists in easier cleanup.
Wire cooling rack: Use this to decrease the cooling time of your bread loaf and save yourself the stress of finding a surface in the kitchen to place your super hot pan.
Oven temp – Preheat the oven to 375F during the last half of your second proof, which should be around the 30-minute mark.
Rack position – To achieve the perfect bake, place an oven rack on the lowest level of your oven. This allows the bottom of the bread to bake without over-browning the top, a key to a well-balanced loaf. Preheat the oven towards the last half of your second proof, which should be around the 30-minute mark. This timing ensures the dough is at its peak for baking.

PRO TIP/ KITCHEN HACK
Utilizing a convection oven: it is prudent to make a conscious adjustment by reducing the oven temperature by 25°F, accompanied by a corresponding reduction in baking time, as convection ovens tend to hasten the baking process.
How to make White Sandwich Bread
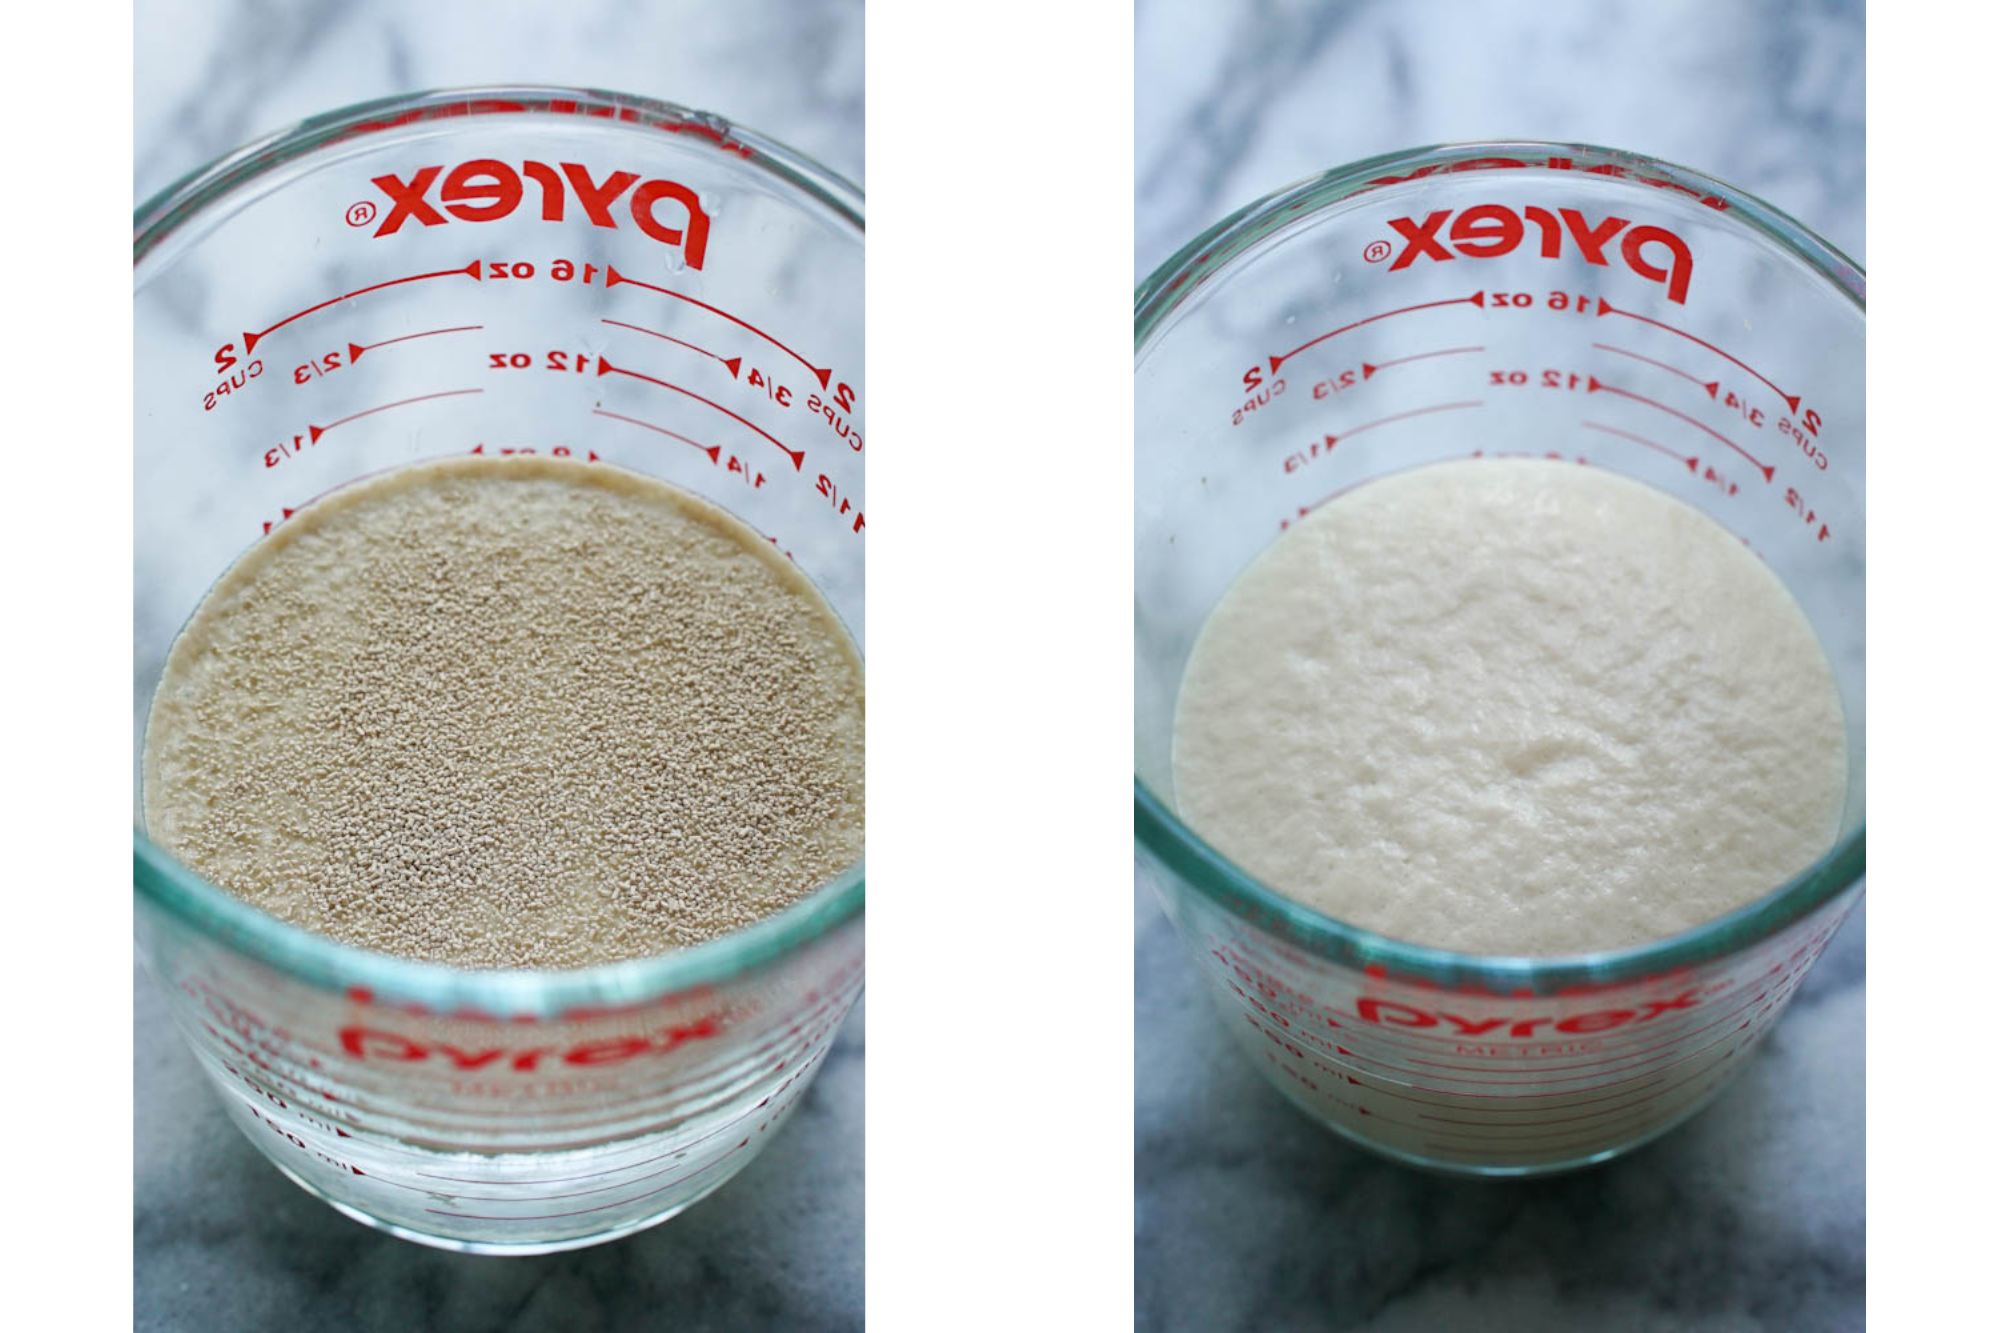
1. Blooming the yeast – In a liquid measuring cup, pour 240ml of lukewarm water (between 100F-110F). Sprinkle in 1/2 tsp of sugar and stir to dissolve – this will help the yeast to feed and bloom. Sprinkle the yeast into the water and then stir for 20 seconds so that the water is cloudy and there is no visible yeast on the water’s surface. Allow the yeast to sit undisturbed for 10 minutes. You should now have a foamy dome of bloomed yeast sitting on your water -congrats! Your yeast is now ready to be incorporated into the recipe!
2. Mixing the dough – Using a stand mixer (or by hand with extra elbow grease), knead the dough for 8-10 minutes. The dough should become elastic and smooth and no longer leave a sticky residue when touched. Finish with the window test to ensure enough gluten has formed in your dough. Pull off a small piece of dough and roll it into a ball with your fingers. Then, gently stretch the dough by both ends and create a thin window to see the gluten strands formed in a web. Fold the dough into a ball with the seams on the underside.
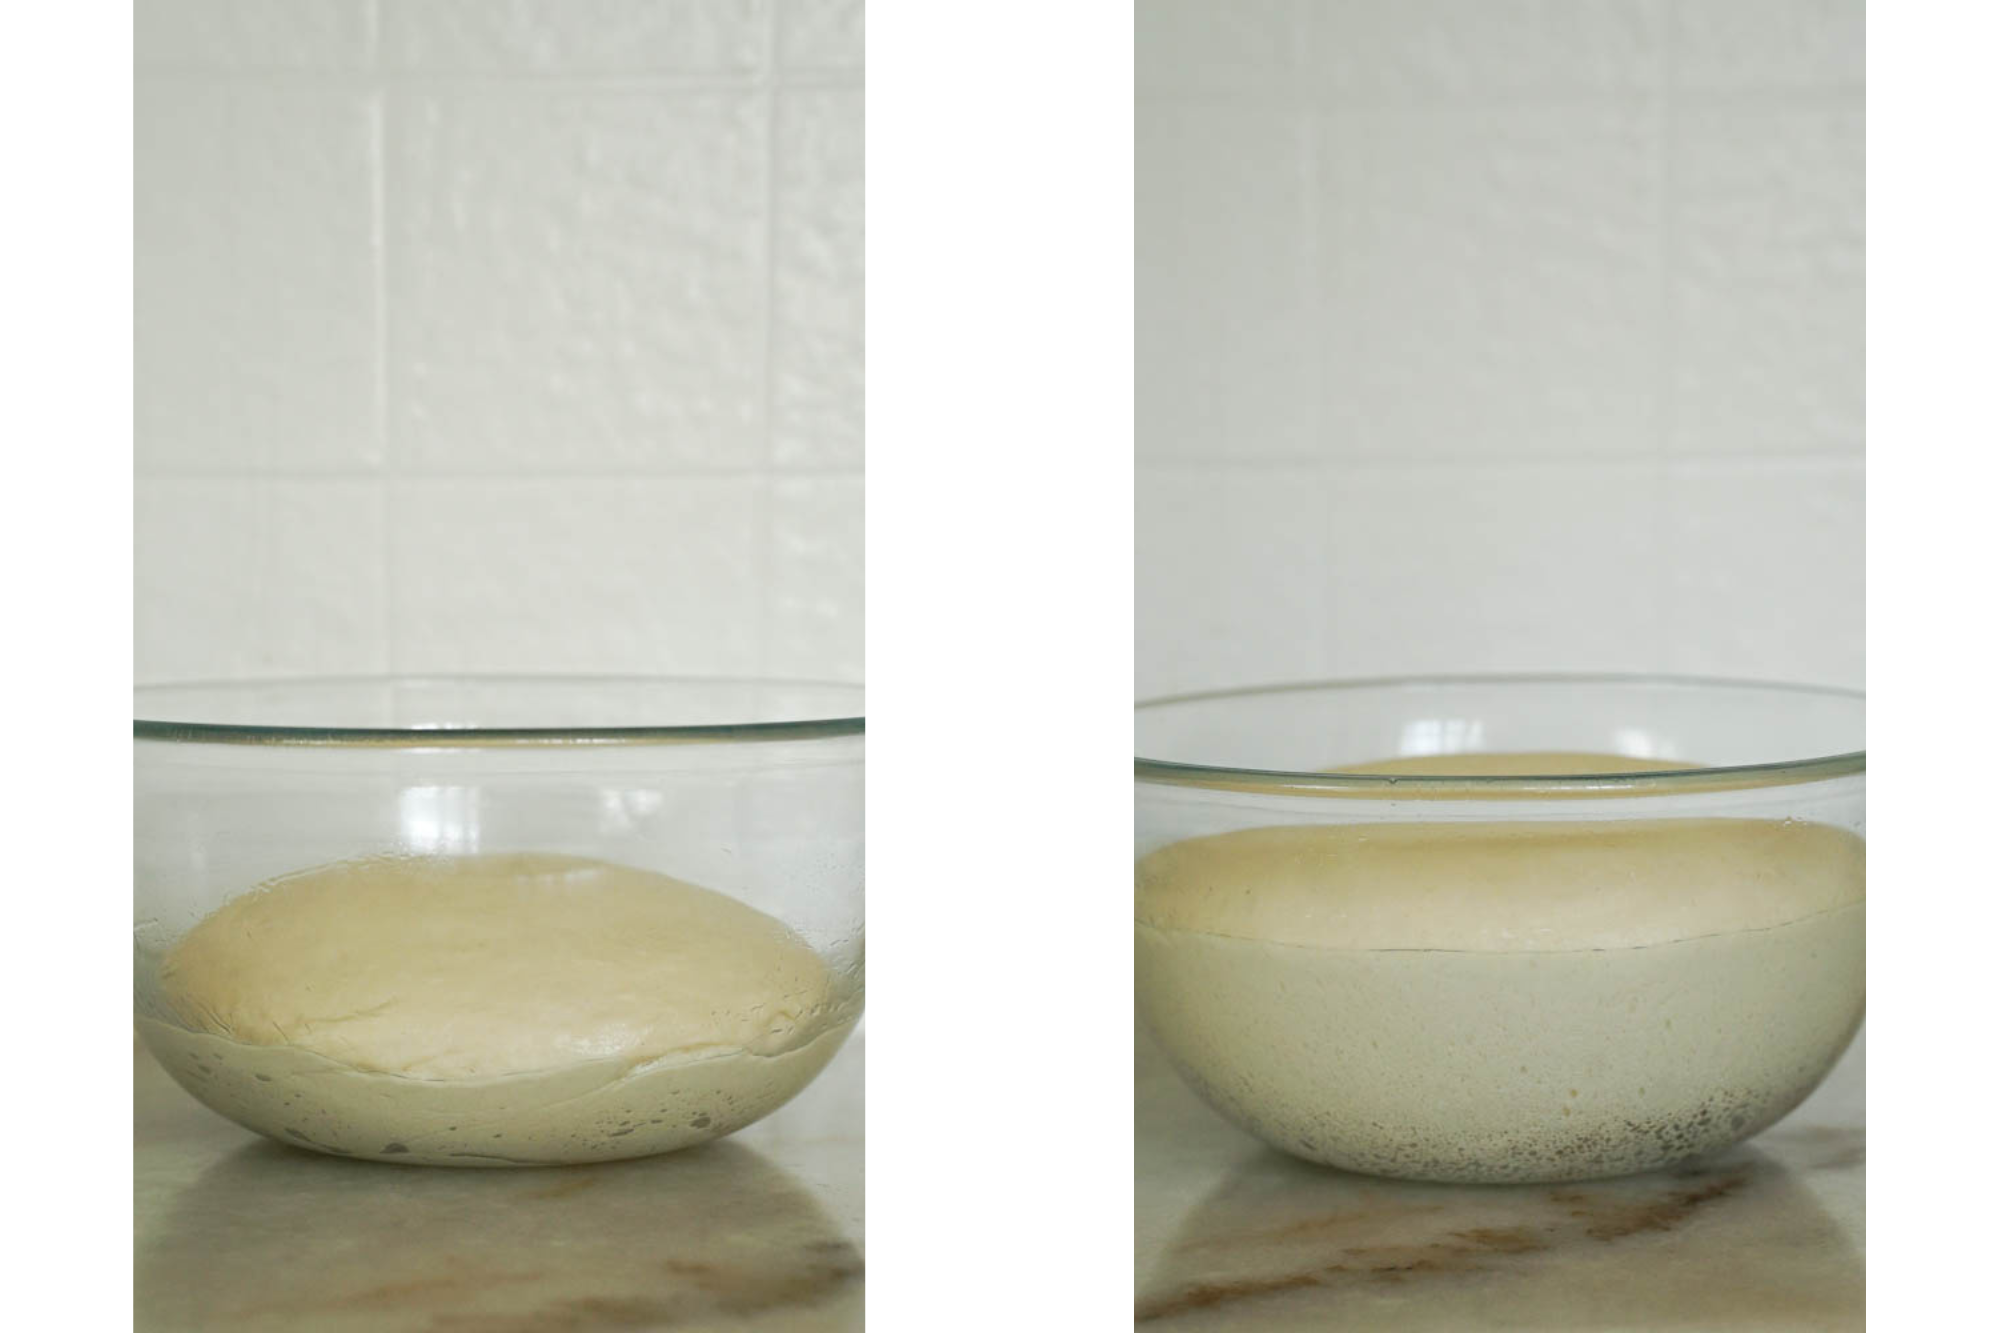
3. First Proof – Oil a large bowl and place your dough inside; cover with a towel and allow the dough to rise for 1 hour (or until double in size). The dough should form small gas pockets and bounce back when gently poked. Remove the dough from the bowl onto an oiled workbench. Punch down on the dough to release the gas that has accumulated inside, and roll it out to a rectangle 8 x 16 inches. Starting on an 8-inch end, begin rolling the dough upwards to create a log, then connect both ends. Allow the dough to rest with the connected ends underneath to help secure the seams.
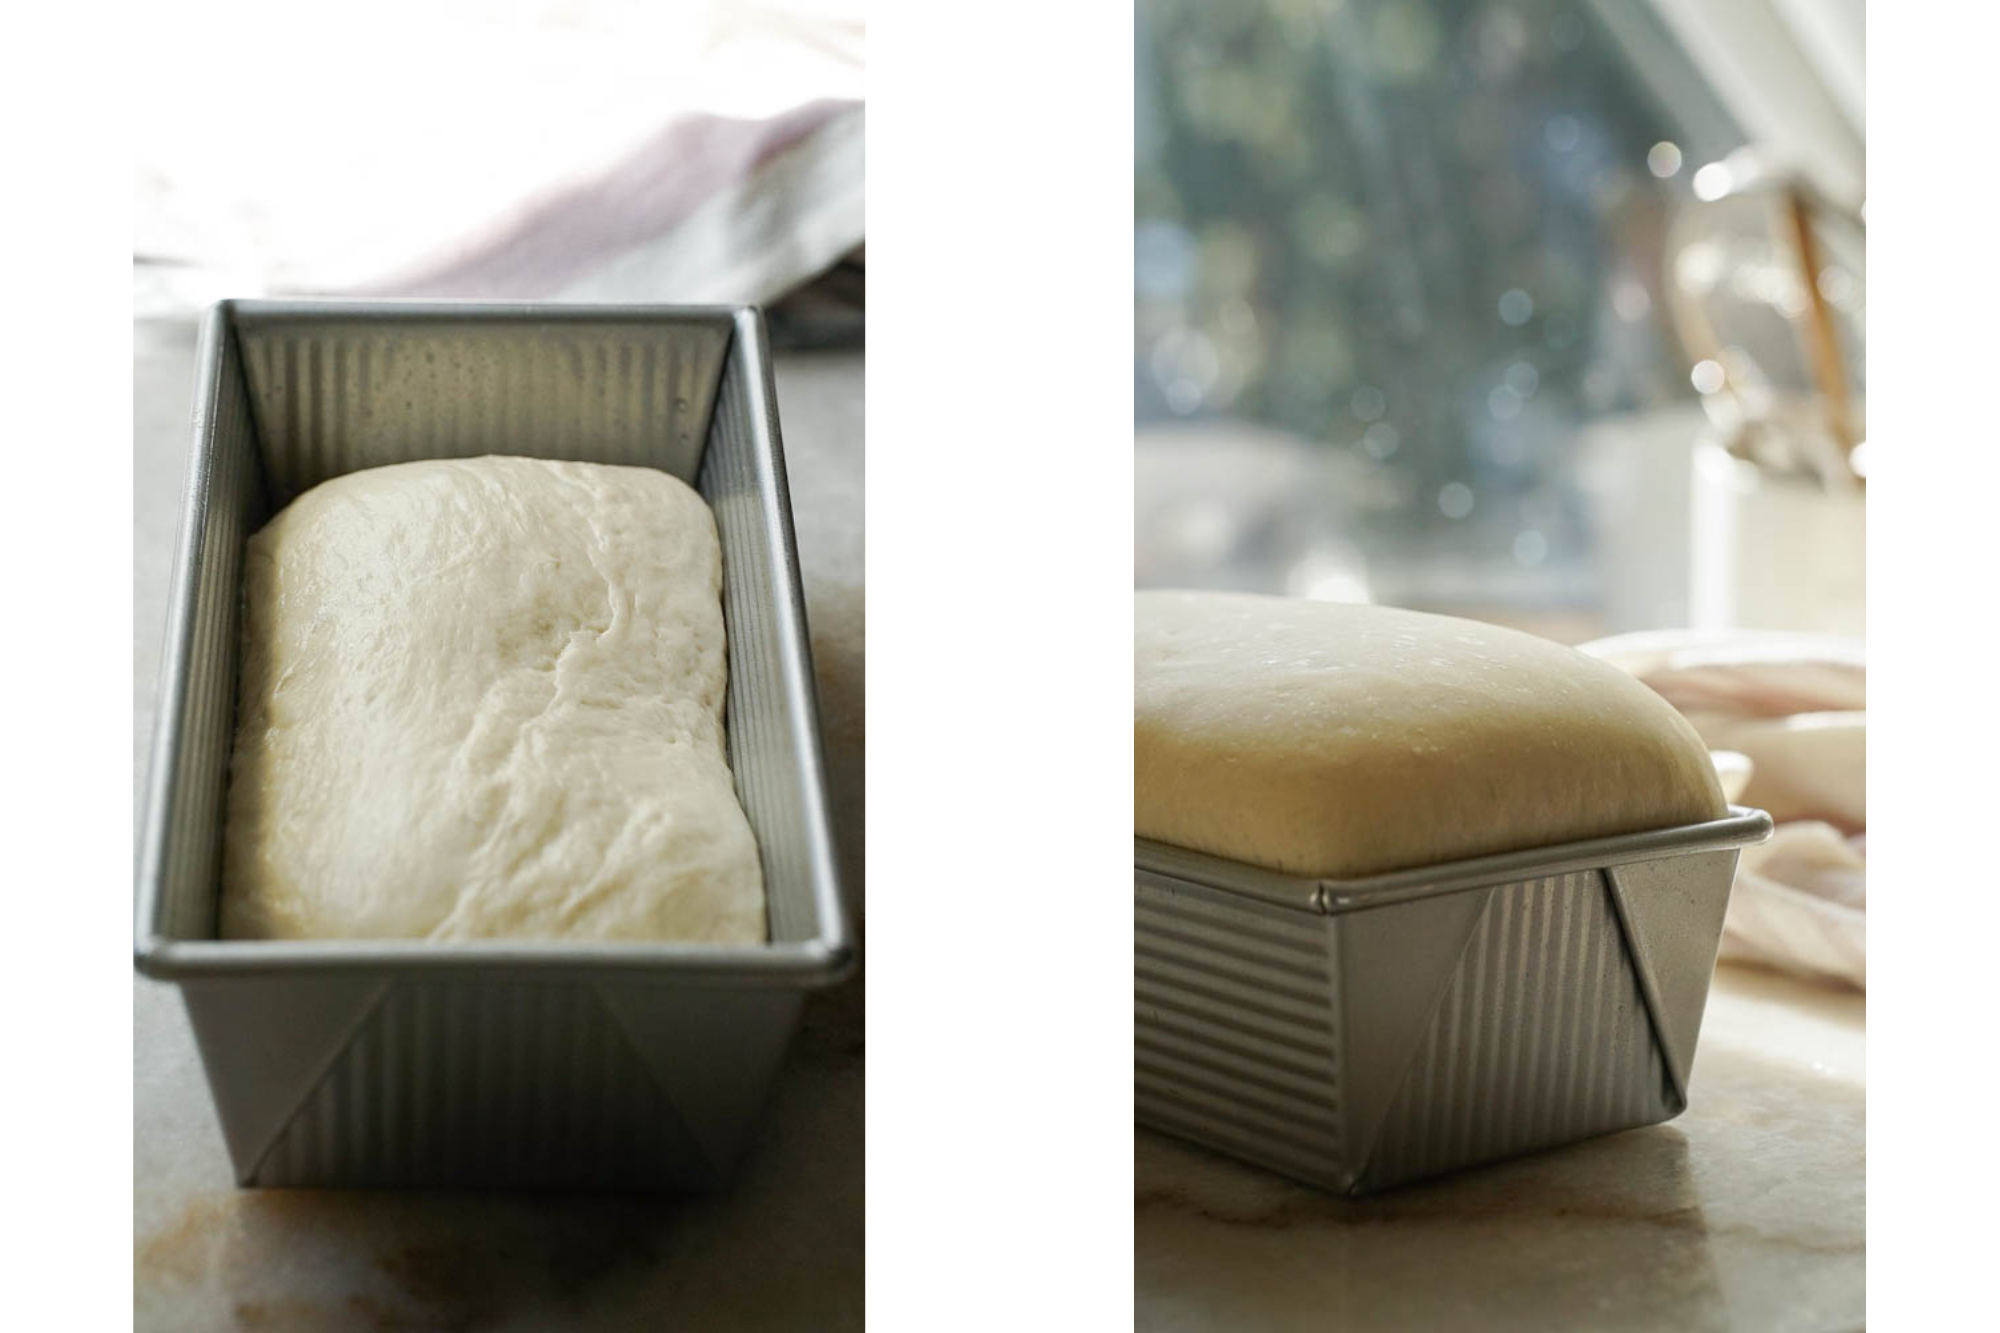
4. Second Proof – Oil the loaf pan and place the bread dough inside with the joined seams facing down towards the bottom. Cover again loosely with the towel and allow to rise again for another 45 minutes to an hour.
PRO TIP/ KITCHEN HACK
Rise above the tin – Allow the dough to rise at least 1 inch above the rim of the loaf tin. When poked, the dough should slowly bounce back leaving a faint indentation for a few seconds.
5. Doneness—Bake the bread on the bottom oven rack at 350F for 30 – 35 minutes. When it comes time to remove the bread from the oven, very carefully remove it from the loaf tin and tap the bottom of the bread—if it sounds hollow, then it has properly baked.
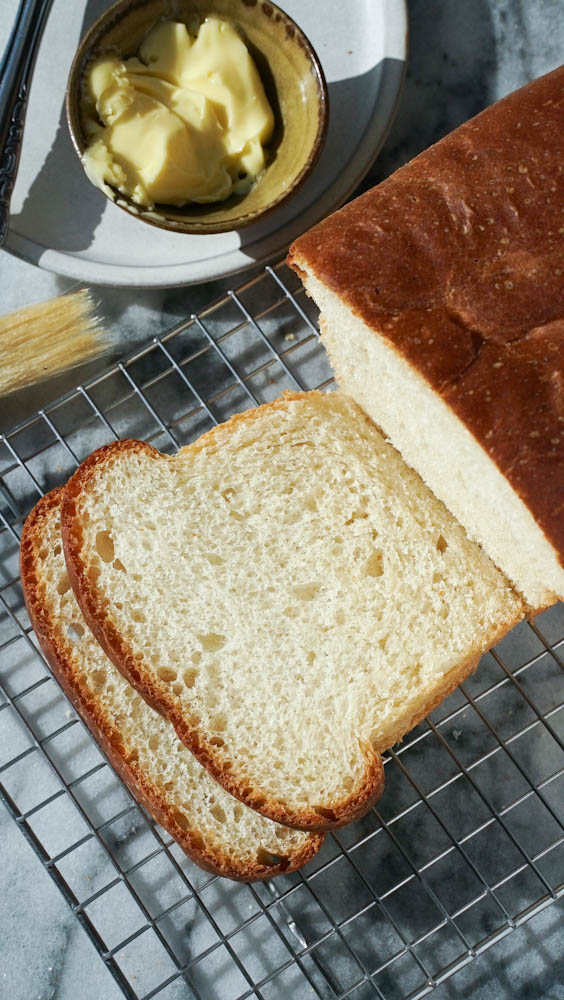
6. Let it cool—Cool the bread loaf on a wire rack and glaze it with melted butter all over—delicious! Allow the bread to sit for at least 10 minutes before picking up a knife. The cooler the bread is, the easier it will be to slice.
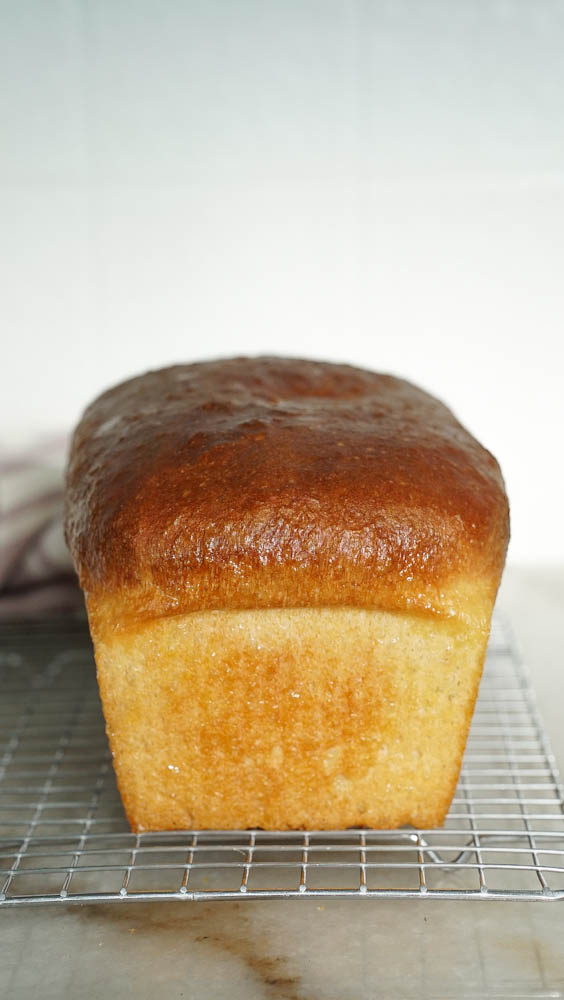
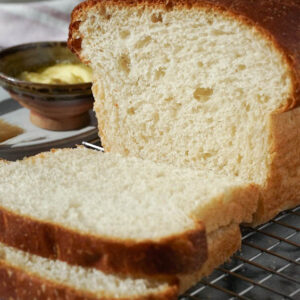
Homemade Bread
This easy white bread recipe uses simple, everyday ingredients and yields a chewy, soft loaf perfect for sandwiches or toasting.
Equipment
- digital scale
- large mixing bowl
- measuring spoons tsp/tbsp
- measuring cup
- stand mixer optional
- loaf tin 8×4 or 9×5
- oven thermometer
- wire rack
Ingredients
- 240 ml lukewarm water
- 1 tsp active dry yeast
- 400 g bread flour
- 2 tbsp sugar or honey
- 1 ½ tbsp oil
- ½ tsp salt
Instructions
- Blooming the yeast – In a liquid measuring cup, pour 240ml of lukewarm water (between 100F-110F). Sprinkle in 1/2 tsp of sugar and stir to dissolve – this will help the yeast to feed and bloom. Sprinkle the yeast into the water and then stir for 20 seconds so that the water is now cloudy and there is no visible yeast on the surface of the water. Allow the yeast to sit undisturbed for 10 minutes.
- Mixing the dough – Add the flour, yeast, sugar, and oil in a mixing bowl. Mix the dough for two minutes using a stand mixer (or by hand with extra elbow grease) and then add the salt. Continue to mix for for 8-10 minutes. The dough should become elastic, and smooth, and no longer leave a sticky residue when touched. Finish with the window test to ensure enough gluten has formed in your dough. To do this pull off a small piece of dough and roll it into a ball with your fingers. Then gently stretch the dough by both ends and you should create a thin window in which you can see the gluten stands formed in a web. Fold the dough into itself to form a ball with the seams on the underside.
- First Proof – Oil a large bowl and place your dough inside, cover with a towel, and allow the dough to rise for 1 hour (or until double in size).
- The dough should form small gas pockets and bounce back when gently poked. Remove the dough from the bowl onto an oiled workbench. Punch down on the dough to release the gas that has accumulated inside and roll it out to a rectangle 8 x 16 inches. Starting on an 8-inch end, begin rolling the dough upwards to create a log, and then connect both ends. Allow the dough to rest with the connected ends underneath to help secure the seams.
- Second Proof – Oil the loaf pan and place the bread dough inside with the joined seams facing down towards the bottom. Cover again loosely with the towel and allow to rise again for another 45 minutes to an hour. Rise above the tin – Allow the dough to rise at least 1-2 inches
- Doneness – Bake the bread on the bottom oven rack at 350F for 30 -35 minutes. When it comes time to remove the bread from the oven, very carefully remove the bread from the loaf tin and tap the bottom of the bread – if it sounds hollow then it has properly baked.
- Let it cool – Cool the bread loaf on a wire rack and glaze it with melted butter all over… uhh delicious! Allow the bread to sit and cool minutes before picking up a knife. The cooler the bread is, the easier it will be to slice.
Tried this recipe? Tag us @Gooddaytobake on instagramLet us know how it was!

 by Good Day To Bake